If you are still facing the most common issues with laptop or PC brightness not working in Windows 8, 8.1, 10, 11, here we will guide you to fix it in few steps. If the brightness button on your computer or laptop does not work, there are many reasons for the problem such as software, some functions of the laptop or PC do not work properly due to incorrect configuration and many other things. This is a problem that is especially common with DELL, Lenovo and HP laptops or computers, which is very annoying when you are working on your laptop or PC, watching movies and videos, taking important photos and playing games.
Why Brightness Doesn’t Work in Windows HP 10, 11, 8
- Malware installed
- Some functions of your computer are not working (check in task manager)
- Updated Windows 8.1 or 10, 11
- Check the keyboard buttons
- Third party software installed
- Updated images cause brightness interference
- Farewell not working properly
- Virus on your computer (must scan your computer)
- You have updated Windows, but the software is not installed correctly
Solution if brightness not working on Windows 8, 10 HP
Phase 1:
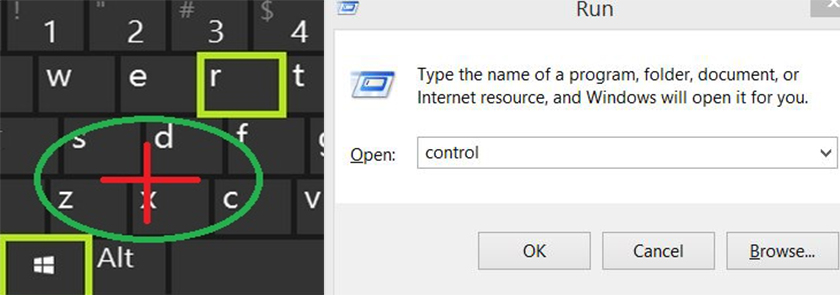
Press the Windows button and R (Window + R) at the same time and the RUN window will open and type Control and press the OK button. After clicking the OK button, a new control panel will open.
Step 2:
Click Device Manager After clicking Device Manager, a new window will open.
Step 3:
Find Display Drivers here and click this button, this will display your computer’s graphics information. Most computers have two graphics, the first is integrated by Intel and the second is like AMD or Nvidia installed in advanced computers. computer or computer.
Step 4:
If you have two graphics cards, double click on the second graphics card, which is a 3rd party graphics card. After double clicking, a new map will open and then click on the Controller tab.
OR
Right-click the third-party graphics card and then click Properties. A new map will open, then click the Controller tab.
Step 5:
After clicking the driver tab, you will see below graphic information such as driver date, driver version, driver update and driver rollback.
Step 6:
If your computer’s video driver is updated and the Reset Driver button can be selected, click the Reset Driver button (this is kind of why brightness doesn’t work on a laptop or PC) when you click the Reset button . , your images will revert to the previous version. After your computer’s video driver is reset, please restart your computer or laptop for a better user experience.
Step 7:
Use the procedure described above if you only have integrated graphics.
Step 8:
If you’ve reset your computer’s graphics card and still don’t see the results, I’ve added another process below to remove the brightness not working on the PC or laptop problem.
Other steps If the brightness does not work in Windows HP
ACCESS:
Before performing this procedure, move files and other important software to an external drive, if available. This step will surely fix the brightness issue on your computer.
Here’s how to fix brightness not working on Windows PC. This is a very simple step that will solve your computer or laptop problem in just a few steps. If you’re still having issues on your computer or laptop, you can use these steps in the future.
Phase 1:
Open your computer’s control panel, as I told you in step 1. (press Window + R at the same time and type control)
Step 2:
Open the control panel, locate the reset icon and double click reset.
Step 3:
Then a new window named “Advanced Recovery Tools” will open, so double click on “Open System Recovery”. Then a new recovery tab will open and click the next button.
Step 4:
After clicking Next again, a new tab of that program will open resulting in an error on the laptop. If the selected program is correct, click Next. If not, click Search for Affected Program and select the program that affected your system.
Step 5:
Clicking Next again will open the last step of the restore point, here you can also select the recovery drive and click the Finish button.


